Saturday, January 25, 2014

pre-LOAD Hop


Welcome to the pre L.O.A.D blog hop.  You should have come here from Dani's blog.  If you stumbled upon the hop by accident, I hope you'll go back to the beginning and see what all the lovely ladies have to offer.

In case you don't know L.O.A.D. stands for LayOut A Day.  It's the flagship class of Lain Ehmann--scrappy super hero extraordinaire.  Three times a year, she challenges a group of scrappers to create a layout every day for a month.  She picks a theme and sends out prompts related to that theme every day of the month with samples from her featured scrapbookers. In preparation for the next event in February, Lisa Hausmann has organized a group of veteran LOADsters give some advice to the newcomers to help them complete the month successfully.

This will be my second LOAD.  My first was last May, and I completed 69 layouts during the month.  It started me on a path of scrappy productivity that I haven't let up on since.  There are a few things that I learned that make it MUCH easier to complete a mission like this.


  •  Limit your supplies.  If you're like most scrappers I know, you have way more stuff than you will ever use.  When you sit down to scrap, it's an overwhelming task just to choose what you're going to work with.  You don't want to be frustrated everyday, so you should decide before the month starts what you are going to use.  I love playing along with the Counterfeit Kit Challenge Blog to get inspiration for putting together kits to work from.

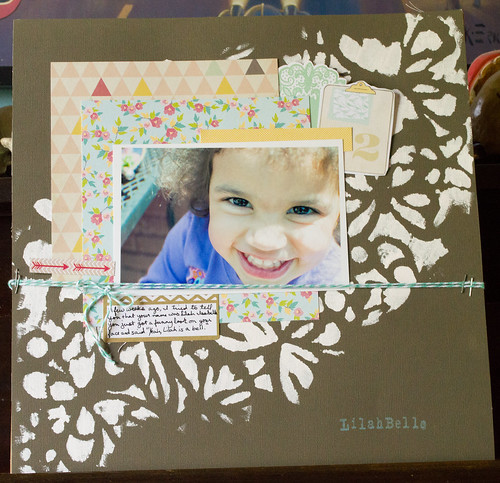
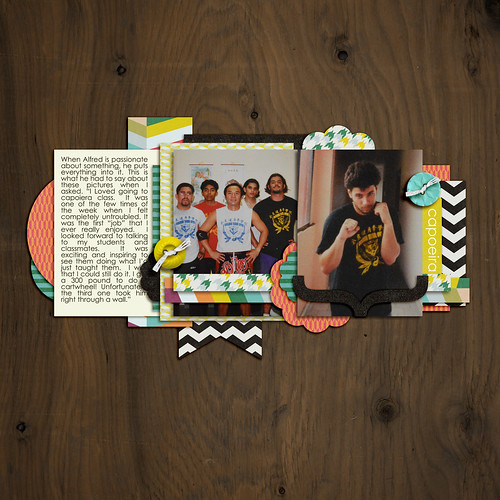
  • Not every layout has to have pictures.  When it comes to memory keeping, it all counts.  Sometimes, the prompts will spark a story that you just need to get down and into your albums.  On those days, just go with it.  Let a large block of text take the place of a photo.

  • Don't be a neat freak.  Have a home base for your LOAD supplies, where you will be able to work on your layout every day and not have to worry about getting things out and putting them away.  It's enough work just getting this done without the extra pressure of having to keep everything tidy too.

  • Pull a few old pictures before the month starts that you've been meaning to scrap, but just haven't had the time.  I have a shoe box of photos I took from my grandmother's house years ago with the intention of scanning them.  Needless to say, that never happened, but with load coming up, I've flipped through that box and pulled a stack of photos that sparked something when I saw them.

  • Do some digi.  I know that not everyone loves digital scrapbooking, or has even tried it, but I do.  What I love about digi is that it's so fast and doesn't require much physical energy.  There are lots of sketches available to take some of the design pressure off paper scrappers, but digi takes it one step further with templates.  Not only has the designer given you a general idea about how to put together the page, but they've also done all the cutting, layering, and sometimes even embellishing for you.  You just have to clip your supplies to the layers (or substitute the layers with your supplies), put in your photos and journaling and you're done.  I have  a set of 52 digital templates that I gave away on my blog last year.  You can go through the posts and download them for free, or if you want to save yourself some time, you can purchase the whole set using the button in the sidebar.
I hope you'll give LOAD a try.  It's an excellent experience with a fantastic community of ladies.  Leave me a comment to let me know you stopped by, but  don't quit here, continue with the rest of the hop!  The next blog in line is Karen at Photos Kept Alive.  If you get lost along the way, here is the full Hop List.  

Kelli www.useitscrapbooking.com/ 
Dani    http://scrapperonthestreet.com 
Valerie http://myrainbowcoalition.blogspot.com/
Karen  http://photoskeptalive.wordpress.com/
Danielle http://ecoscrapbook.blogspot.com/
Connie http://clickychickcreates.com/
Sherrie http://littlebitofeverythingme.blogspot.com 
Cara   www.vincens.typepad.com/
Heather http://noexcusescrapbooking.com/
Kim  http://gma654.blogspot.com 
Christy http://myscrapbookevolution.blogspot.com/
Lisa E http://lisae-design.blogspot.com/
Lisa H http://lisahausmann.blogspot.com

Wednesday, January 22, 2014

Ill advised embellishment

Do you ever get an idea in your head for a scrapbook page and realize after you start to execute that it was a bad idea?  That's what happened to me with this layout.


Everything was done except the quiet week at the top of the page.  I decided that it needed something else, and "It's been a quiet week in" would be the perfect thing.  I started out thinking that I would make a cut file, so I designed it and printed it out to figure out where I would put it.  The problem was that the lines would be too thin in the word week.  Rather than going back to the drawing board, I decided that embroidery would be the perfect old-timey embellishment for this page.

I  laid the paper over my page, taped it down, and started poking holes.  About halfway through poking holes, when my hand was aching, I realized that perhaps this wasn't my best idea ever. But...I already had a ton of holes in the top of my layout.  I stubbornly pushed forward.  An over an hour later, I finally had a finished product.

I'll admit that I love the way it feels to run my fingers over the embroidery, but it took me three times as long to do as the whole rest of the layout.  I don't think there will be too much more embroidery in my scrappy future.

Monday, January 20, 2014

2014 Love Note Station

During the month of February every year, I set up a love note station.  They're always a little different, but the basic components are: a mailbox for each member of the family, something to write with, and blank paper or cards.  Usually, I make a flat envelope for each person that we hang on the wall, but this year, I thought I'd try something a little different and go with these 3 dimensional heart boxes.  I could have downloaded a box in the Silhouette Online Store, but I decided that I wanted something a little less formal that anything that was available there.  I wanted the heart to be a little bigger on one side than the other --the way that I actually draw them.  I started with plain cardstock and drew a heart on it. (At this point, you might want to use a string to measure around the heart. The project is a little easier if the heart is less than 12 inches around.)


I cut that heart out to serve as a template for the top and bottom of all of my boxes. I traced that heart and flipped it over to trace another one (because the top and bottom will be flipped horizontally from one another).  Next, I cut out the hearts for the top and bottom of my box leaving a 1/4 inch border around the outside of the drawn heart.  (It doesn't matter that it's exact; it can be a little more or less)

Next, you'll use a scoring tool to score along the line of the drawn heart.  Then, using a pair of scissors, you'll notch the border around the heart, with the notches ending at the score line. Fold the notches toward the center of the heart with the drawn side up.


For the top, you will cut a 1 inch strip of paper long enough to go around the whole heart.  You want to make sure that when you draw your heart, the circumference is less than 12 inches, so you don't have to glue 2 strips together like I did. One tab at a time, glue the strip to your tabs using a fast drying, liquid glue (like glossy accents).


Now, the top is done.  To make the box itself, you use a 4 inch wide strip of paper instead of a 1 inch wide strip, and repeat the procedure.


At this point, you have a plain box that you can decorate any way you like.  I made 4: one decorated with patterned paper, and the rest with washi tape.

Our blank Valentines will be 3 x 4 journal cards, so I cut a slit in the top of the box 3.25 inches wide with a craft knife.


It's a little early to set up our love note station, but it will look something like this

Tuesday, January 14, 2014

CKCB: January LO #2

I'm loving working with my January kit, "Start Here"


I finally got sick of being penned up in my house the other day, so I packed up my kids and my kit and headed out to a "local" scrapbook store. I read about Scrapbooks Plus on TwoPeasInABucket.com in their forums last week.  I've heard of the store before, but the thread mentioned that the store had been completely remodeled including moving the "children's play area" closer to the crop tables.  Those were the magic words for me.  The store is about an hour from my house, but it was a huge plus to have somewhere for my kids to play while I shopped and cropped.  

It was like going to Disney!  I haven't seen a scrapbook store this big since I went to Archiver's in Mall of America...and we all know I won't be able to do that ever again.  I did buy a few little things while I was in the store including a set of Gold Daiquiri Thickers.  I've been drooling over those Thickers online for ages, so I had to sit right down at their tables and use them right away!  I hope you'll forgive me that I cheated a little bit and added those gorgeous Thickers to my January kit for this layout.


(Lilah likes sparkly things just as much as I do)


Saturday, January 11, 2014

Simple Sketches 20: First CKCB layout of the year.

Melissa released another sketch today over at Simple Sketches


I really liked this sketch, so I decided to use it for my first CKCB layout of the year. Here's my kit "Start Here"


  Unfortunately, I didn't have any photo paper in the house.  I decided to try a new technique.  I've seen lots of examples of print transfers using tissue paper on pintrest, but I'd never tried any of them. My lack of photo paper was just the motivation I needed.

In this case, I printed the photos on white tissue paper.  I tried printing on the tissue paper a couple of different ways, but the one that worked the best was to use washi tape to attach the tissue paper a piece of cardstock (just to one side, don't wrap it around the edges).


I cut out the photos, and mod podged them to a sheet of patterned paper (the same one I used for the circles on the layout).  The result is a very subtle pattern that shows through the photos.  Here is the overall layout.


If you decide to use Melissa's sketch, I hope you'll link your layout in the Linky on the blog.

Wednesday, January 8, 2014

The Lilypad: Month of Challenges

At the end of last month, I saw an announcement that www.the-lilypad.com was going to be having a month of challenges, and they were giving away 2 Pollywog (their creative team) spots as one of the prizes.  


I don't know if you've noticed, but I have quite the paper habit, so I don't allow myself that much of a budget for my digi supplies.  I get The Digi Files, and I go shopping on Digital Scrapbook Day, but that's really just about it.  I'm kind of in love with several of the designers at The Lilypad, so I figure being a Polly might be a way for me to get my hands on some more of their fabulous stuff.  

Of course, since I'm me, I couldn't just do the MOC.  I decided to do ALL of the challenges they're running on the site this month.  One challenge per day, plus the 7 monthly challenges, plus 4 weekly challenges, that's 42 digi layouts this month. So far, I have 16.  I don't know that you'll be seeing all of them, but I know you'll see a bunch (I might even turn some of them into templates).  


The one problem (if you want to call it that) I've run into is that I'm "caught up" with my recent photos, and it's January (read: really, really flippin cold!) so the babies and I are not going anywhere. (There are only so many pictures of the inside of my house that I'm going to feel compelled to scrap.) So I started digging into some of my old photos and (GASP!)...scanned them! I even scanned some post cards for the layout above.

It was scraplifted from this layout from one of the Pollys, Melissa.


Are you doing any challenges this year?  

Friday, January 3, 2014

CKCB January 2014: Start Here

This month, CKCB is back to inspiring us all by highlighting a fabulous kit club.  We are counterfeiting Hip 2 Be Square's December 2013 kit.


When I look at this kit, the first thing I see is the color scheme.  I started there to build my kit: aqua, yellow, and coral.  Here's my kit, I'm calling it Start Here because of the journal card I included from the digital Rain Project Life core kit.


The polaroid frame and the moon and stars journal card were die cut from 1/32 in bass wood sheets.  I did those in my Silhouette Portrait, those worked out ok, but I wouldn't recommend it for very intricate designs, the wood is very delicate.  It works great with manual dies, though.


I think I'm going to have a lot of fun with embellishments this month. Now, to take some pictures!


Wednesday, January 1, 2014

Creative Knockouts: All that glitters

Happy New Year!  I hope you had a fabulous time during your celebrations! This week the challenge at Creative Knockouts is "All that glitters."  I took that rather loosely just to mean shiny.  I'm loving gold right now, so I used my gold acrylic paint to fill in gold accents on these 3x4 journal cards.

The cards are made with mixed media paper, that I made with a homemade gelli plate and acrylic paint.  I then stamped on top of them with Staz On Jet Black ink.  To color in the stamped images I used the gold acrylic paint and gelatos with my water brush.


My favorite is the card on the bottom right that says smile.  That sketched flower is one of my favorite stamps.  I use it in all sorts of projects, but this time I started by going around with a darker layer of paint around the edges, and then blended it in towards the middle.